Mastering Parker FastSeal: Assembly Made Easy
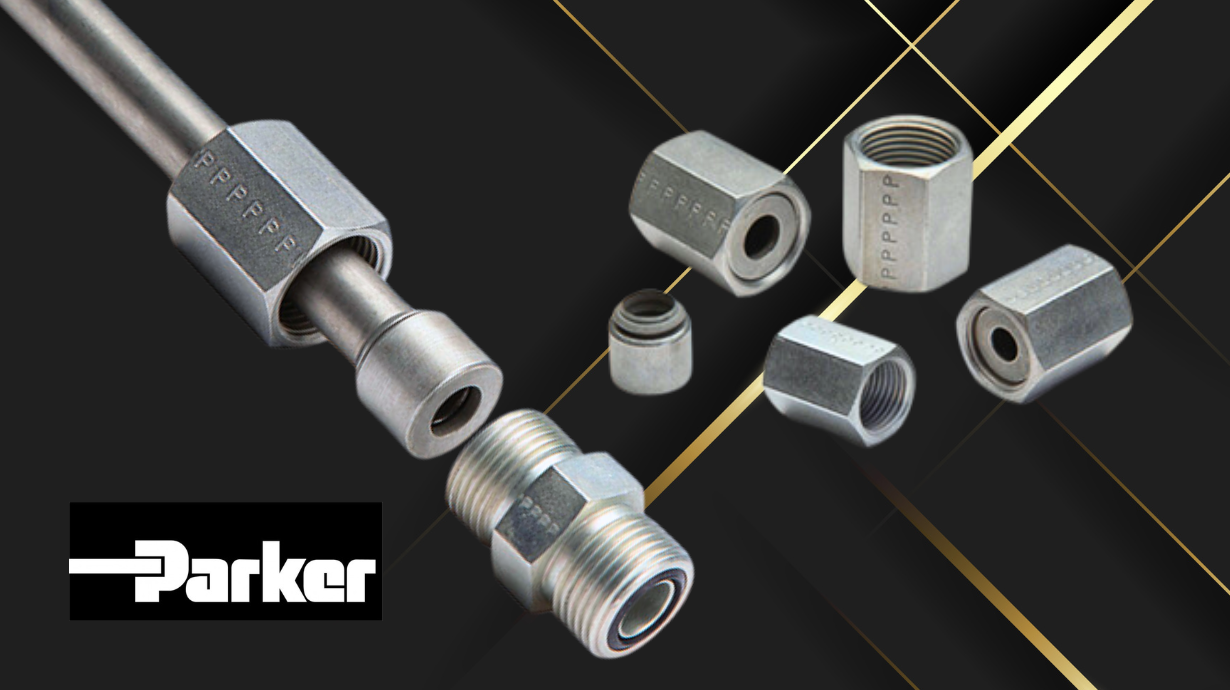
Parker FastSeal is a revolutionary O-ring face seal fitting that takes the hassle out of high-pressure hydraulic connections. Unlike traditional compression-style fittings, FastSeal is easy to assemble and offers a secure, leak-proof connection, making it the superior choice for your next hydraulic application.
Why Choose FastSeal?
Many other tube fitting technologies require you to flange or braze hydraulic tubing to make ORFS connections. With Parker’s FastSeal, all you need is a wrench! FastSeal combines Parker's robust bite ring and innovative seal dynamics to create a quick robust flat-face tube connection for Seal-Lok ORFS fittings. This innovative design offers several advantages:
Leak-proof performance: The precise positioning of the tube eliminates the potential for leaks, even in demanding high-pressure applications.
Reduced assembly time: The assembly process is significantly faster than traditional methods, saving you valuable time on installation.
Enhanced reliability: FastSeal's secure connection minimizes the risk of component failure, keeping your hydraulic system running smoothly.
Easy maintenance: Disassembly for inspection or replacement is a breeze, thanks to the straightforward design.
Assembling Your FastSeal: A Step-by-Step Guide
Ready to experience the ease of FastSeal? Here's a quick walkthrough of the assembly process:
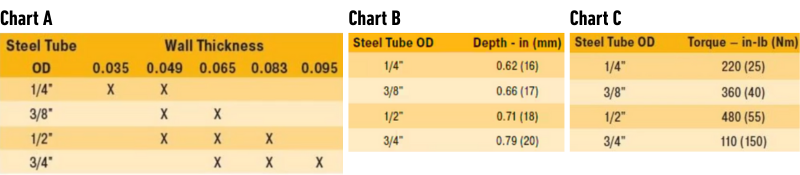
Ensure you have the right thickness: Using chart A, ensure your tube has an appropriate wall thickness when compared to the outer diameter.
Prepare your tube: Ensure your tube is properly cut, deburred, and cleaned.
Mark the tube: Use a Parker presetting tool, or use chart B to determine the appropriate insertion depth. Mark this depth on your tube.
Lubricate the tube end: Apply a light coat of hydraulic oil to the end of the tube for smoother insertion.
Hand-tighten the nut: Screw the FastSeal nut onto the fitting body by hand until snug. This is easier with the help of a fixed vise, when available.
Insert the tube: Gently push the lubricated tube end into the FastSeal nut until you reach the pre-marked depth. Using a twisting motion may help overcome resistance. You will feel the tube pop past the internal O-ring then stop whin it bottoms out.
Tighten the nut: Using a wrench, tighten the FastSeal nut to the recommended 7 to 8 flats, as outlined in the Parker instructions. Mark the original position if helpful for keeping track of the number of turns. You will feel a noticeable rise in torque at around 7 flats.
Inspect for gaps: Loosen and slide back the nut to inspect the tube for gaps. A “closed gap” can vary from 0.0" to 0.01". If a gap of more than 0.01" is visible, reassemble to the last position and tighten an additional 1/2 a flat, then inspect again for gap closure.
Congratulations! You've successfully assembled your FastSeal fitting! Once the assembly is complete you are ready for installation. Ensure tube is properly installed by referencing chart C for torque needed to seal the connection.
Experience the Triad Advantage
Triad Technologies is your source for FastSeal, as well as a wide range of other reliable hydraulic products and accessories. Our team of experts can provide valuable advice on selecting the right FastSeal for your application and answer any questions you may have. Contact us today to request a quote and experience the leak-proof confidence of Parker FastSeal!
Additional Tube Assembly and Installation Resources:
Connection Comparison: Hydraulic Hose vs. Tube Assemblies
A Pocket Guide to Tube Line Clamping from Triad Technologies
Short Code:
Credit Limit:
Current Balance: